本地paddle serving部署
TEST
UCI_housing
下载模型
1 | wget --no-check-certificate https://paddleserving.bj.bcebos.com/uci_housing.tar.gz |
由于直接在windows本机上部署,所以不需要上述命令,直接下载文件解压
安装paddle serving
1 | pip install paddle_serving_server //在CPU环境上安装paddle_serving_server |
直接在windows上安装会报错,因为fnctl这个库只在linux上,所以用WSL
应该是用WSL的原因,安装GPU版本的显示找不到GPU,还是用的CPU
报错sentencepiece安装失败:
Failed to find sentencepiece pkg-config去官网下载 sentencepiece ,版本:
sentencepiece-0.1.94-cp36-cp36m-manylinux2014_x86_64安装:
pip3 install sentencepiece-0.1.94-cp36-cp36m-manylinux2014_x86_64WSL自带python2、python3.6,默认用python2,切换:
1
2
3
4sudo update-alternatives --install /usr/bin/python python /usr/bin/python2 100
sudo update-alternatives --install /usr/bin/python python /usr/bin/python3 150
需要切换到python2时:sudo update-alternatives --config python
启动服务
1 | python -m paddle_serving_server.serve --model uci_housing_model/ --thread 10 --port 9292 --name uci |
- model:Server 端配置与模型文件所在目录。
- thread:Server 端线程数。
- port:Server 端预测服务端口号。
- name:HTTP 预测服务的的名称,如果不指定 name,则会启动 RPC 预测服务。
测试
同样使用WSL测试
1 | curl -H "Content-Type:application/json" -X POST -d '{"feed":[{"x": [0.0137, -0.1136, 0.2553, -0.0692, 0.0582, -0.0727, -0.1583, -0.0584, 0.6283, 0.4919, 0.1856, 0.0795, -0.0332]}], "fetch":["price"]}' http://127.0.0.1:9292/uci/prediction |

文本
语义模型
Bert
下载模型
目标是给定输入一个句子,推理服务可以将句子表示成一个语义向量返回给客户端。
1 | import paddlehub as hub |
报错:cublas64_100.dll not found
下载相应的文件 地址,放到 C:\Windows\System32 文件下
模型下载后可以移到当前文件夹下,然后用 module = hub.Module(directory="")加载
- 也可使用 bert 这里的 prepare_model.py
启动服务
在WSL下:python -m paddle_serving_server.serve --model bert_seq128_model/ --thread 10 --port 9292
这之后 参考 这个网站上的代码有些问题
参考 bert python -m paddle_serving_server.serve --model bert_seq128_model/ --port 9292
这个项目里用的长度为128,但模型都是一样的,名字都是 bert_chinese_L-12_H-768_A-12
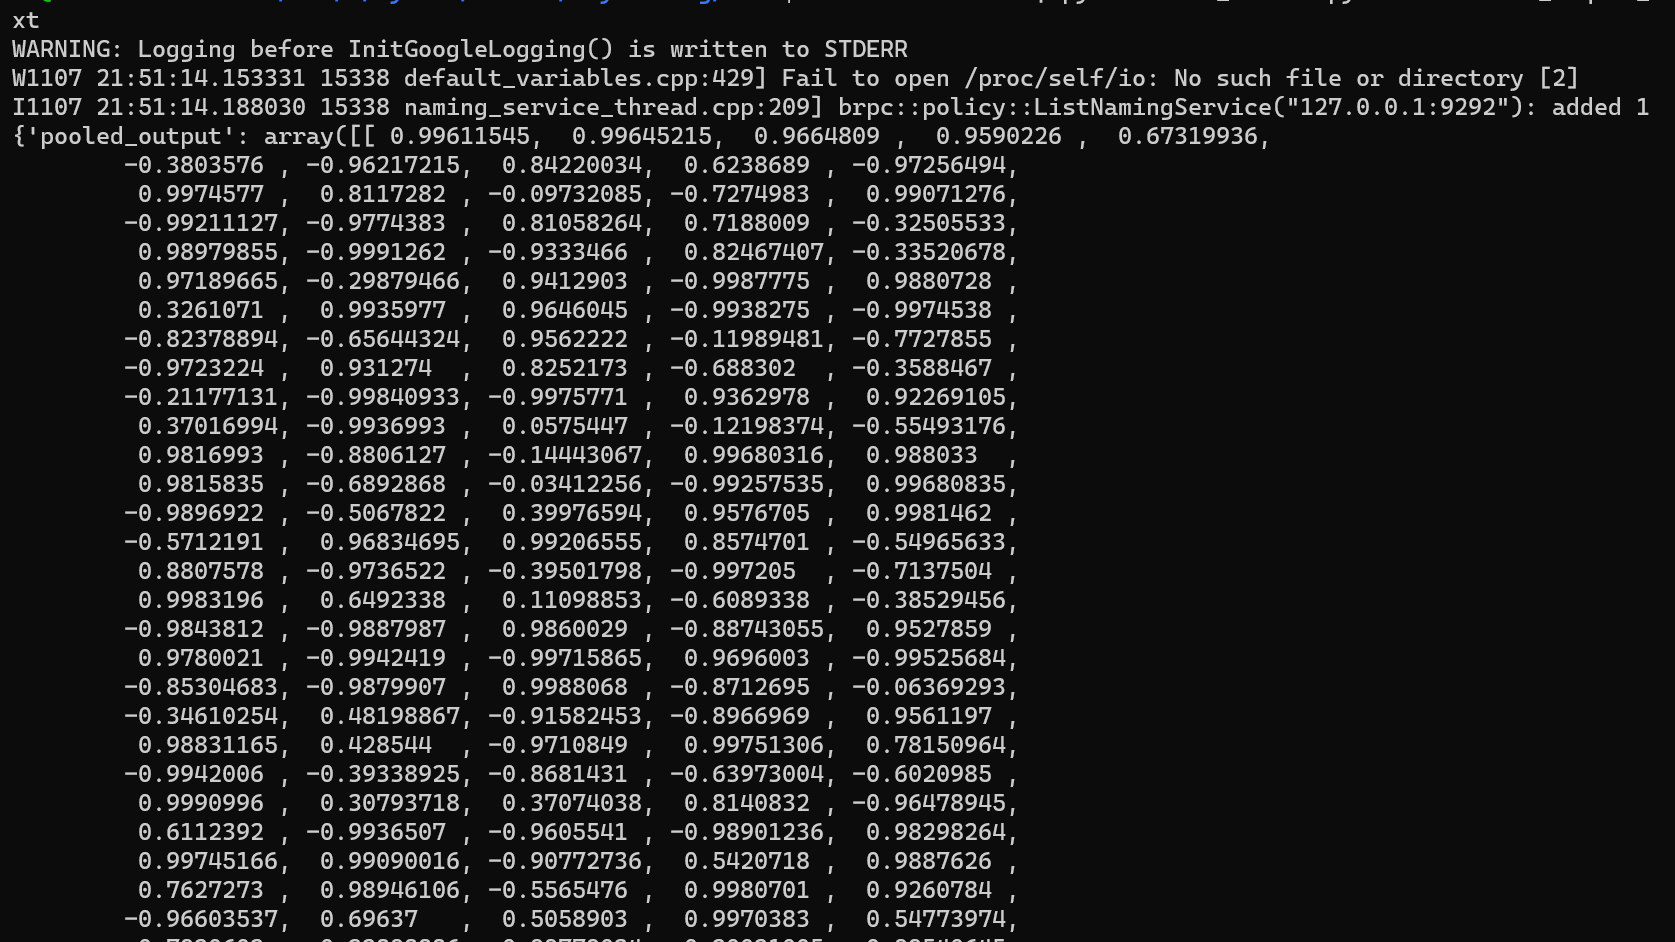
测试
首先用WSL运行getdata.sh,脚本将下载中文词典vocab.txt和中文样例数据data-c.txt ,然后测试:
1 | head data-c.txt | python bert_client.py --model bert_seq128_client/serving_client_conf.prototxt |
- ImportError: libSM.so.6: cannot open shared object file: No such file or directory
1 | Python3环境下,import cv2 提示 |
- 最后一行的结果
词法分词
LAC
下载模型
1 | hub install lac==2.2.0 |
命令行预测:
1 | hub run lac --input_text "今天是个好日子" |

本地运行
1 | import paddlehub as hub |
启动服务
1 | hub serving start -m lac -p 9292 |
测试
1 | import requests |
图像
人脸检测
pyramidbox
下载模型
hub install pyramidbox_face_detection==1.1.0
测试
1 | import paddlehub as hub |
图像生成
stylepro_artistic
下载模型
hub install stylepro_artistic==1.0.0
测试
1 | import paddlehub as hub |
目标检测
SSD
下载模型
可以通过代码下载
1 | ssd = hub.Module(name="ssd_mobilenet_v1_pascal") |
也可以安装
1 | hub install ssd_mobilenet_v1_pascal==1.1.1 |
如果通过代码进行测试,可以更改模型位置,用 ssd = hub.Module(directory = "") 加载即可,在当前文件夹下用 hub run ssd_mobilenet_v1_pascal --input_path "./images/test_img_cat.jpg" 也可
如果要启用serving服务,不能指定模型位置,比如 hub serving start -m ./ssd_mobilenet_v1_pascal 会找不到位置
启动服务
hub serving start -m ssd_mobilenet_v1_pascal -p 9292
测试
1 | import requests |
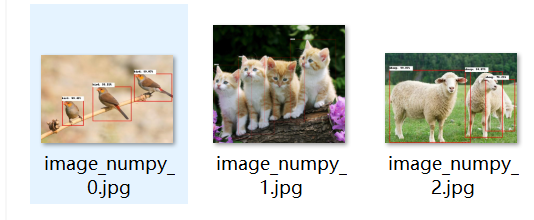
fix
如果是多张图片会出现在同一张图片上绘制检测框的问题:
源码中processor,修改以下代码
1 | # Fixed the following one line of code |
图像分类
EfficientNet b7
下载模型
hub install efficientnetb7_imagenet==1.1.0
本地运行
1 | import paddlehub as hub |
启动服务
1 | hub serving start -m efficientnetb7_imagenet -p 9292 |
测试
1 | import requests |

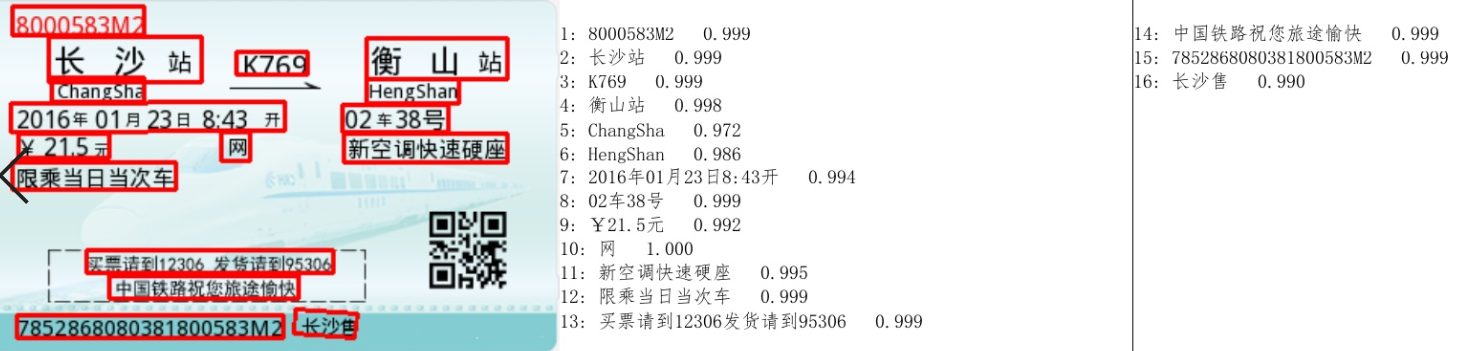
文字识别
Chinese_text_detection
下载模型
1 | $ hub install chinese_text_detection_db_server==1.0.2 |
命令行预测:hub run chinese_text_detection_db_server --input_path "/PATH/TO/IMAGE"
本地运行
- visualization = True
1 | import paddlehub as hub |
- 报错
from shapely.geos import lgeos:

conda install -c conda-forge shapely
启动服务
1 | hub serving start -m chinese_text_detection_db_server -p 9292 |
测试
1 | import requests |

Chinese OCR Mobile
chinese_ocr_db_crnn_server 运行中需要的内存资源太大了
下载的是 chinese_ocr_db_crnn_mobile
下载模型
1 | hub install chinese_ocr_db_crnn_mobile==1.1.0 |
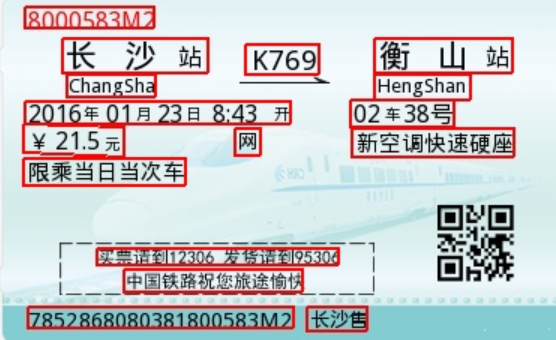
命令行测试: hub run chinese_ocr_db_crnn_mobile --input_path './images/3.jpg'
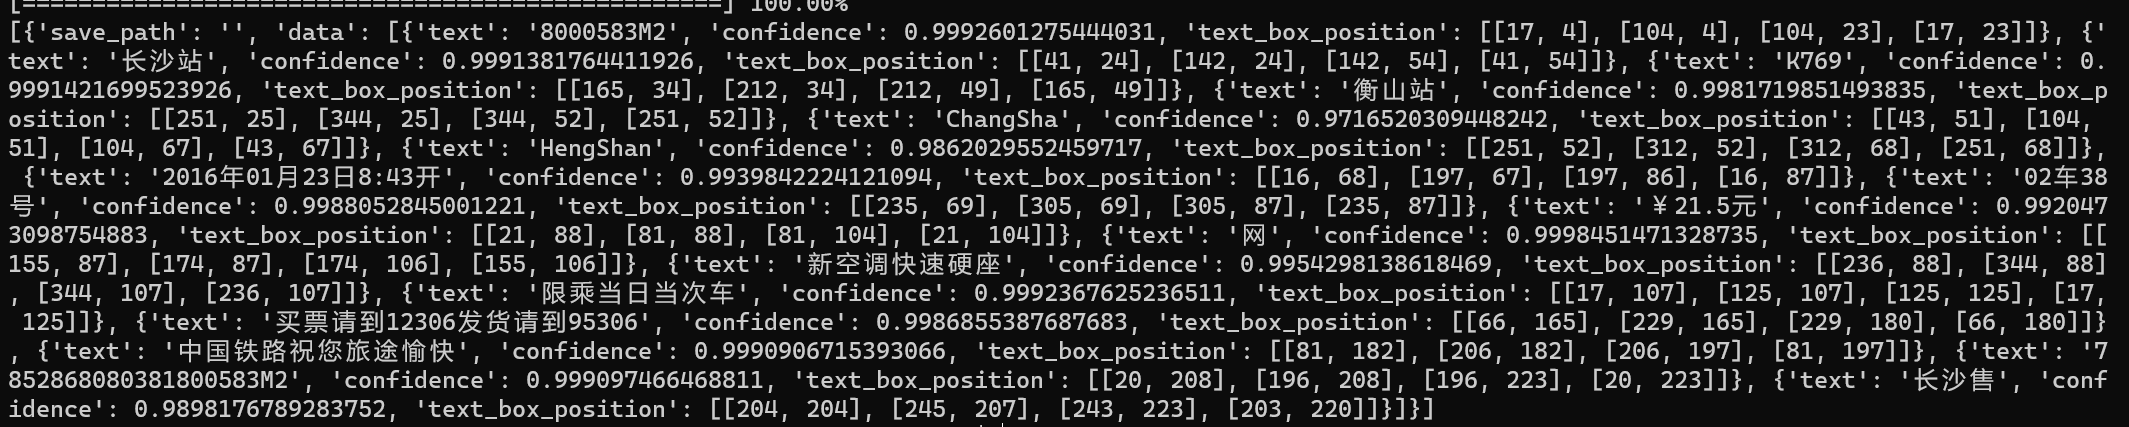
本地运行
- visualization = True
1 | import paddlehub as hub |
启动服务
1 | hub serving start -m chinese_ocr_db_crnn_mobile -p 9292 |
测试
1 | import requests |
图像分割
Humanseg Mobile
下载模型
1 | hub install humanseg_mobile==1.1.0 |
命令行运行:hub run humanseg_mobile --input_path "/PATH/TO/IMAGE"

本地运行
1 | import cv2 |
直接运行的话,一个文件夹中的全部图片只有一部分能得到结果,因为源码中按照时间戳命名保存图片,运行的太快会覆盖掉之前的。
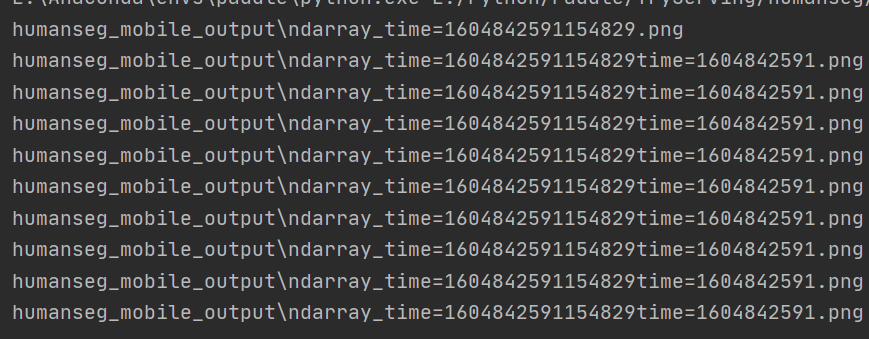
修改process中get_save_image_name,直接使用随机数
1 | ext = '.png' |
启动服务
1 | hub serving start -m humanseg_mobile -p 9292 |
测试
1 | import requests |